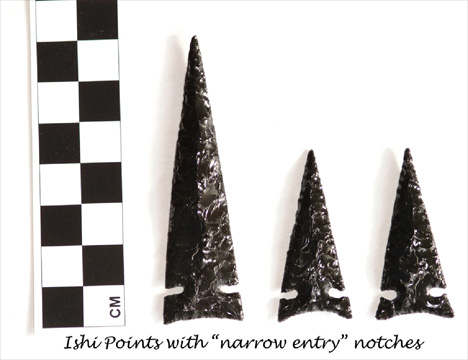
Narrow or closed entry notches are typical of Ishi and Wintu style projectile points and are difficult to achieve especially when using obsidian.

Many people advocate the use of horseshoe nails which have been sharpened at the tip to make these notches. Even so, much skill and practice is required. It has been my observation that better results are attained when the nail is held securely by some device that prevents either side to side or front to back movement of the nail, in other words, the tip of the horseshoe nail must be held in a fixed and rigid manner.
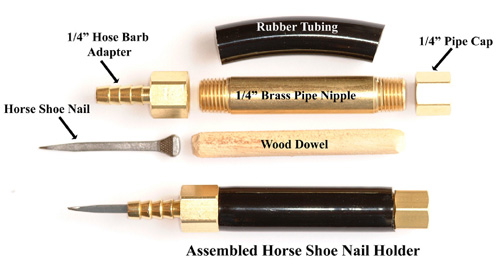
After several attempts I’ve come up with a tool made from parts purchased from a local hardware store that holds the nail securely and allows for rapid replacement of worn nails without inconvenient modification of head of the nail.

The picture above illustrates the component parts and their assembly.
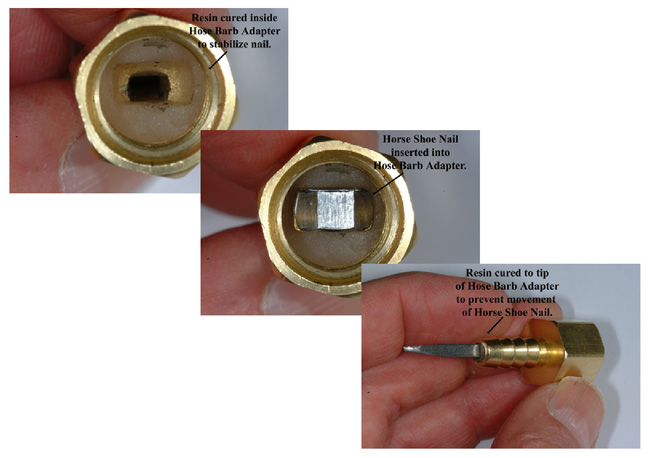
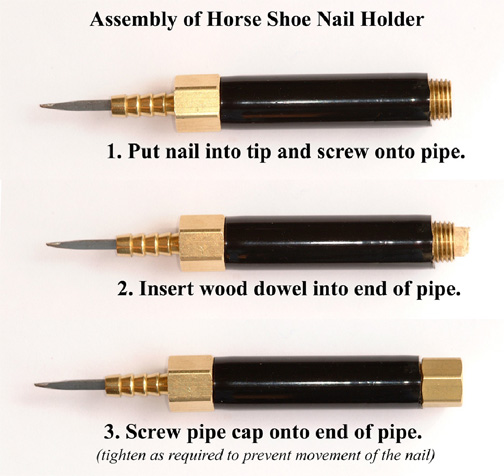
The hose barb adapter was filled with a self-curing acrylic resin up to the “height of contour” of the head of the nail to provide side-to-side stability and quick interchangeability. Alternatively, you can coat the nail with a thin layer of paraffin and use expoxy resin instead of acrylic resin to set the master nail in the adapter. Epoxy resin may be more readily available in local hardware stores and the wax coating on the master nail makes it very easy to tap it out after the epoxy resin has set. When completely assembled the wood dowel presses against the head of the nail to provide front-to-back stability. The sharpened nail tip is rigid within the nail holder.

Follow the steps illustrated below to assemble the horseshoe nail holder.

You can sharpen the tip of the nail with a file and when the nail becomes too worn out and unusable it can be quickly replaced with a new one. The horseshoe nails I used are the Capewell, CH 6, product # 10017. They have a distributor in Sacramento, Horseshoe Barn, (916) 925-6534 or you can go to their website at www.capewellhorsenails.com for more information. Lastly, some type of magnification is really helpful when doing this type of notching style since exact placement of the tip of the instrument on the platform of the intended notch is crucial to success. Check out either optivisor or megaview magnifiers on the web.
(One last note: the tool described above, when assembled seems a little heavy in the hand but I got used to it very quickly and actually the weight seems about right for taking flakes out of fairly thick bases.)